| Main Page | Overview | Introduction | Editions | Reviews | Changes | Help | FAQ | Guides | Contact | EULA | Privacy |
Customising the invoice

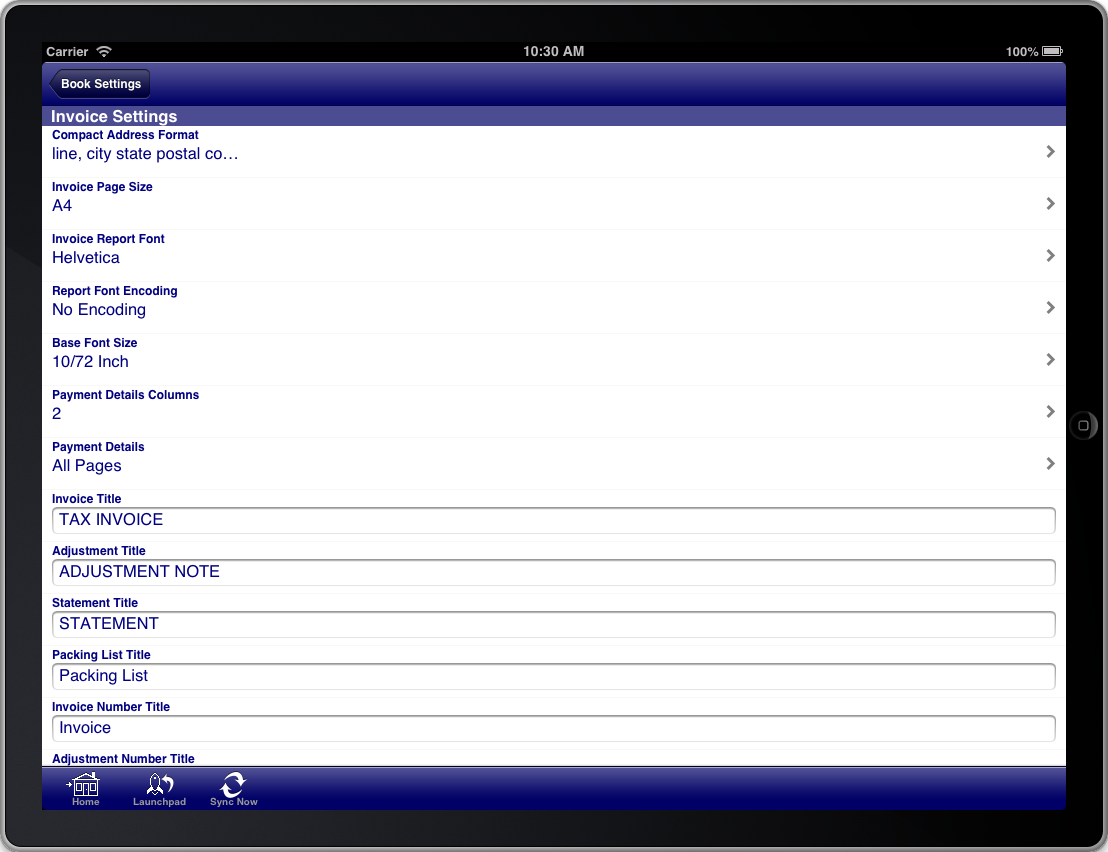
Screen: Invoice Settings
There are many customisations that can be made to the invoice to meet your requirements. All customisations are made via the “Invoice Settings” section of the “Book Settings” menu. The “Book Settings” menu is accessible from the toolbar at the bottom of the screen.
Once you have made the necessary adjustments to the invoice settings you can return to the sale screen and generate the invoice again to see the results of your configuration changes.
You do not need to do this for every invoice that you generate. You generally do this for the first invoice to get it looking how you want and then leave the settings the same for all invoices that you generate.
You can import your company logo on the "Book Details" screen and this will then appear in the top left corner of invoices instead of the text that you see in the example invoice.
The following customisation options are available:
- The address formatting on the invoice
- The paper size for the invoice
- The font for the invoice
- The font size for the invoice
- The number of columns for payment details
- Which pages to put the payment details on
- Customise the wording of all titles on the invoice
- Whether to show the company logo on the invoice
- Where to place the company details
- Which columns to show on the line items section of the invoice
- How freight is shown on the invoice
- How sales taxes are shown on the invoice
- Which payment details are shown on the invoice
- Which addresses are shown on the invoice
- Which dates are shown on the invoice
- Which other fields are shown on the invoice
The invoice settings control the customisation for the invoice, adjustment note, and sale statements.