| Main Page | Overview | Introduction | Editions | Reviews | Changes | Help | FAQ | Guides | Contact | EULA | Privacy |
Sale Refund Summary

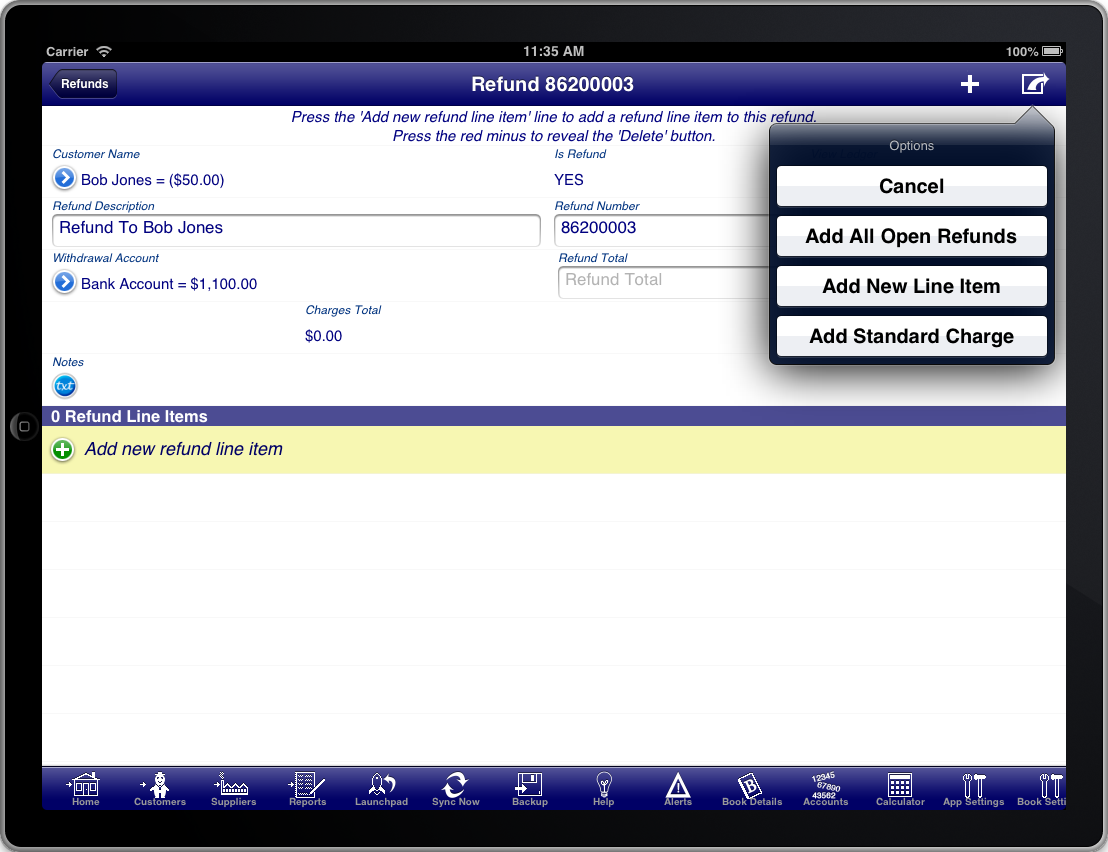
Screen: Sale Refund Summary
The sale refund summary screen allows you to enter the summary details about the refund like the refund date.
The "Withdrawal Account" must be selected to indicate which account the refund was provided from.
You can either select a bank account or cash account where the funds where refunded from, or you can select a customers credit account to apply the refund as a credit for the customer.
If the customer does not have a credit account set up then you can do this on the customer details screen. You can access the customer details screen from the sale refund summary screen by pressing the blue disclosure next to the customer name, then selecting the blue disclosure next to the customers name in the customer selection list. The credit account is specified in the "Credit Account" field.
Just like a sale, a sale refund needs to have at least one line item.
There are several ways to select the line items that are being refunded.
- Use the "Add All Open Refunds" option from the option menu at the top of the screen
- Enter the amount into the "Refund Total" field and allow the program to select the line items up to the entered refund amount.
- Enter the refund line items manually by tapping the "Add new refund line item" line.
The "Add All Open Refunds" option will scan all sales and adjustments for the customer for items that can be refunded and add them to this refund.
Entering the "Refund Total" amount manually works like the "Add All Open Refunds" option however it stops adding items once the amount specified has been reached.