| Main Page | Overview | Introduction | Editions | Reviews | Changes | Help | FAQ | Guides | Contact | EULA | Privacy |
Purchase Line Items
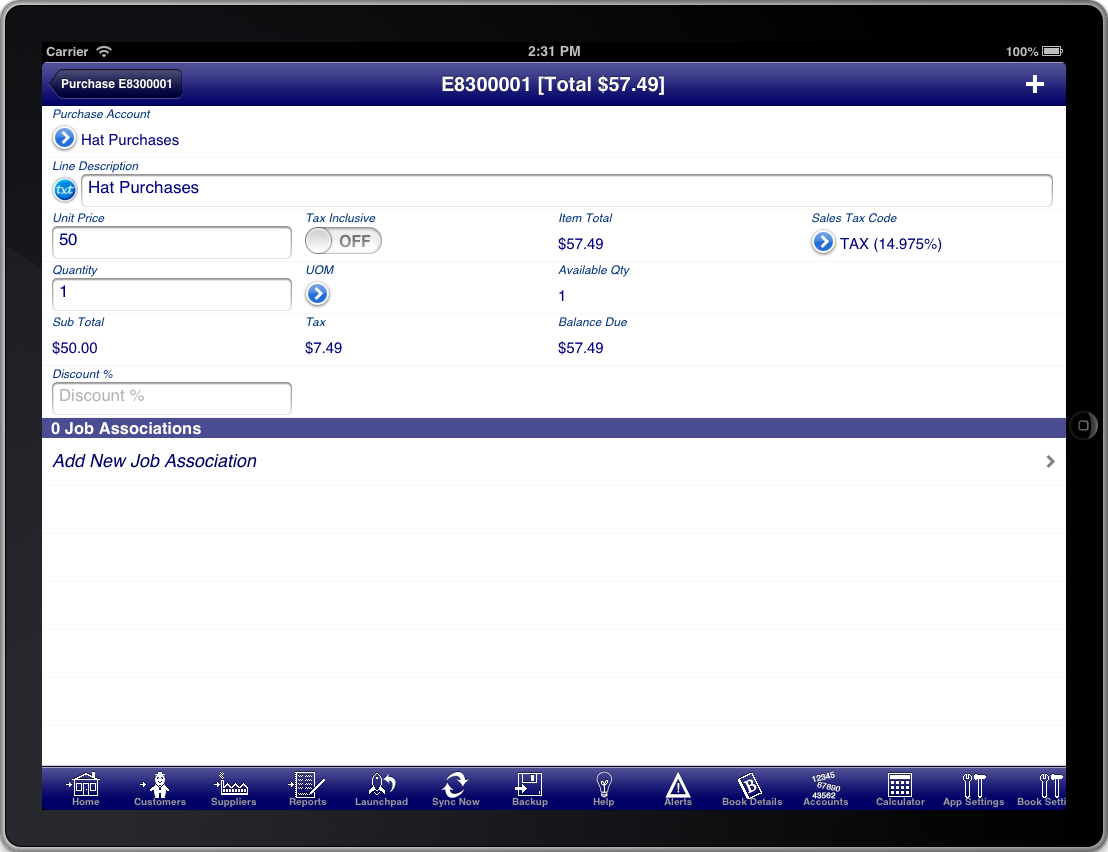
The Purchase line items screen is accessed from the "Purchase Summary" screen by tapping on the "Add new Purchase line item" line in the "Purchase Line Items" section of the screen, or by tapping on an existing line item in the "Purchase Line Items" section.

Screen: Purchase Line Items
The Purchase line item is used to enter the details of the Purchase. It can be used for information purposes only in which case you only enter the “Line Description”. Otherwise you must select the “Purchase Account” that the line item is attributable to.
Inventory items are not shown on the screen to select from unless you have actually created at least one inventory item. To create an inventory item press the "Inventory" button on the toolbar.
Purchase accounts are used to categorise each of the line items of your Purchase. For example you might have an expense account for general Purchases, another expense account for freight charges that you are charged by suppliers, etc.
You do not need to pre-create each of the Purchase accounts. Instead you can press the blue disclosure button under the “Purchase Account” field to reveal the Purchase account list and from there you can press the “+” button at the top right to create a new Purchase account, or alternatively select one of the existing accounts shown in the list.
Once you have selected a purchase account the Purchase item screen will reveal additional fields that are relevant including the unit price, Sales tax codes, quantity, etc. The unit price, or total price if you turn the tax inclusive switch ON, is required as is the quantity field. A description is also required however it defaults to the purchase account name; you can adjust it to another description if you wish. Most other fields are optional and depend upon your business needs.
You can enter simple mathematical expressions into any of the numerical fields. For example you can enter an expression like “10 + 10” and the program will calculate the result and put “20” into the field for you.
You can quickly add an additional line item by pressing the “+” button at the top right of the Purchase item screen.
When you are finished adding line items you can return to the Purchase summary screen by pressing the back button at the top left of the screen.