| Main Page | Overview | Introduction | Editions | Reviews | Changes | Help | FAQ | Guides | Contact | EULA | Privacy |
RFQ Summary

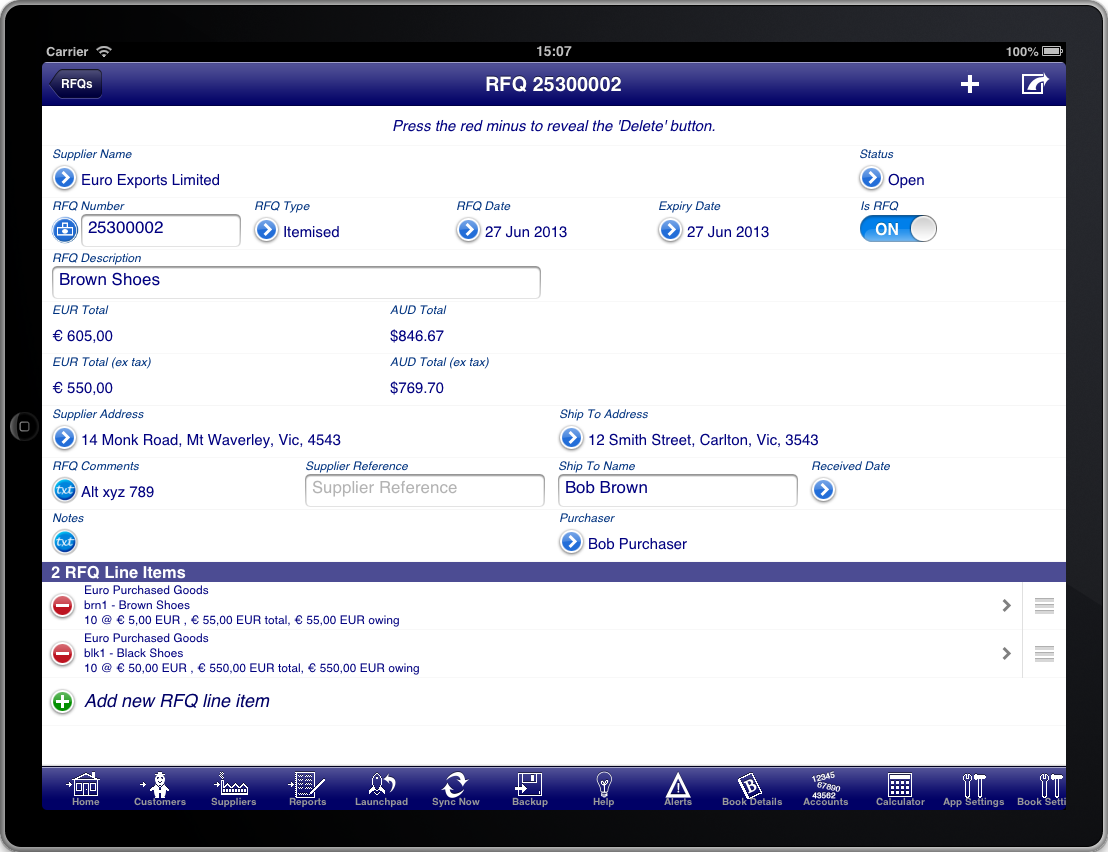
Screen: RFQ Summary
In the case of a RFQ the first important information is the “Supplier Name” field. Press the blue disclosure to select the Supplier that the RFQ is for.
Most information on the RFQ screen is populated for you. However you may need to adjust the “RFQ Date” to the date of the RFQ. You can also adjust the Expiry Date if necessary.
The expiry date is calculated based on the RFQ date and the payment terms defined for the Supplier on the Supplier details screen.
The "RFQ Summary" screen is used to enter details about the RFQ like the RFQ date, expiry date, shipping address, etc. The items for the RFQ are entered on the "RFQ Line Items" screen.
The "RFQ Type" field determines whether the RFQ has quantities and units of measure or not.
- An "Itemised" RFQ shows both quantities and units of measure by default.
- A "Service" RFQ does not show either the quantity or the units of measure.
You are also required to enter the RFQ line items for the RFQ. Every RFQ must have at least one line item. The line items are where you enter the details of the RFQ. Press the “Add new RFQ line item” line to create a new line item on the RFQ.
You will be required to enter a RFQ description that summarises the purpose of the RFQ. If you do not do this then the description from the first line item will be used as the RFQ description.
If the Supplier accepts the RFQ and you wish to convert it into a purchase then simply turn the "Is RFQ" switch to OFF and the RFQ will immediately become a purchase.